ARC Raiders Matriarch Guide: Spawns, Weak Points, Loadout and Drops
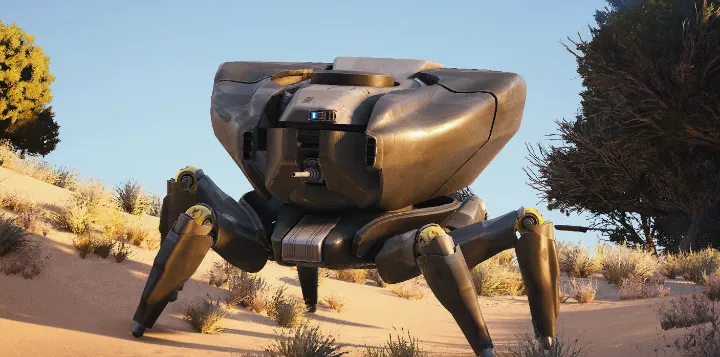
The Matriarch is the biggest fight in ARC Raiders outside the Frigate. She only shows up during her own map condition, she calls in other ARC to protect her and she hides behind a shield that stops every bullet. Kill her and you get the Matriarch Reactor, the part behind the last Trophy Display stage and the Aphelion rifle
The Matriarch at a glance
| Matriarch | |
|---|---|
| Armor | Heavy |
| Health | About 23,000 (a community estimate, not an official number) |
| When | Only while the Matriarch map condition is on, one hour at a time |
| Maps | Dam Battlegrounds, Spaceport and The Blue Gate |
| Weak points | Two faceplates on her front, then the glowing red core behind them |
| Main attack | Missile Swarm: 3 to 6 homing missiles at a time |
| Abilities | Gas capsules, flashbang capsules, an energy shield and ARC reinforcements |
| XP | +1,000 for the kill, +1,000 for looting the core, +500 per leg |
| Best drop | Matriarch Reactor (Legendary) |
When and where the Matriarch spawns
You will never run into her by accident. The Matriarch only exists while the Matriarch map condition is active, and that condition only rolls on three maps: Dam Battlegrounds, Spaceport and The Blue Gate
Like every condition, it lasts one hour and starts on the hour. The live schedule on our ARC Raiders store page shows when the next Matriarch window opens in your region, so you can queue into the right map instead of hoping
She is loud and she attacks on sight. Every Raider on the map hears the fight, and the ones who don't want her want your loot. Plan for both
Her attacks and abilities
The Matriarch does not chase you across the map. She holds her ground and makes every piece of cover a bad place to stay
- Missile Swarm: her main attack. She fires 3 to 6 missiles from her back. They go straight up first, then fly at where they last saw you. This is the attack that kills Raiders, so break line of sight the moment you hear the launch
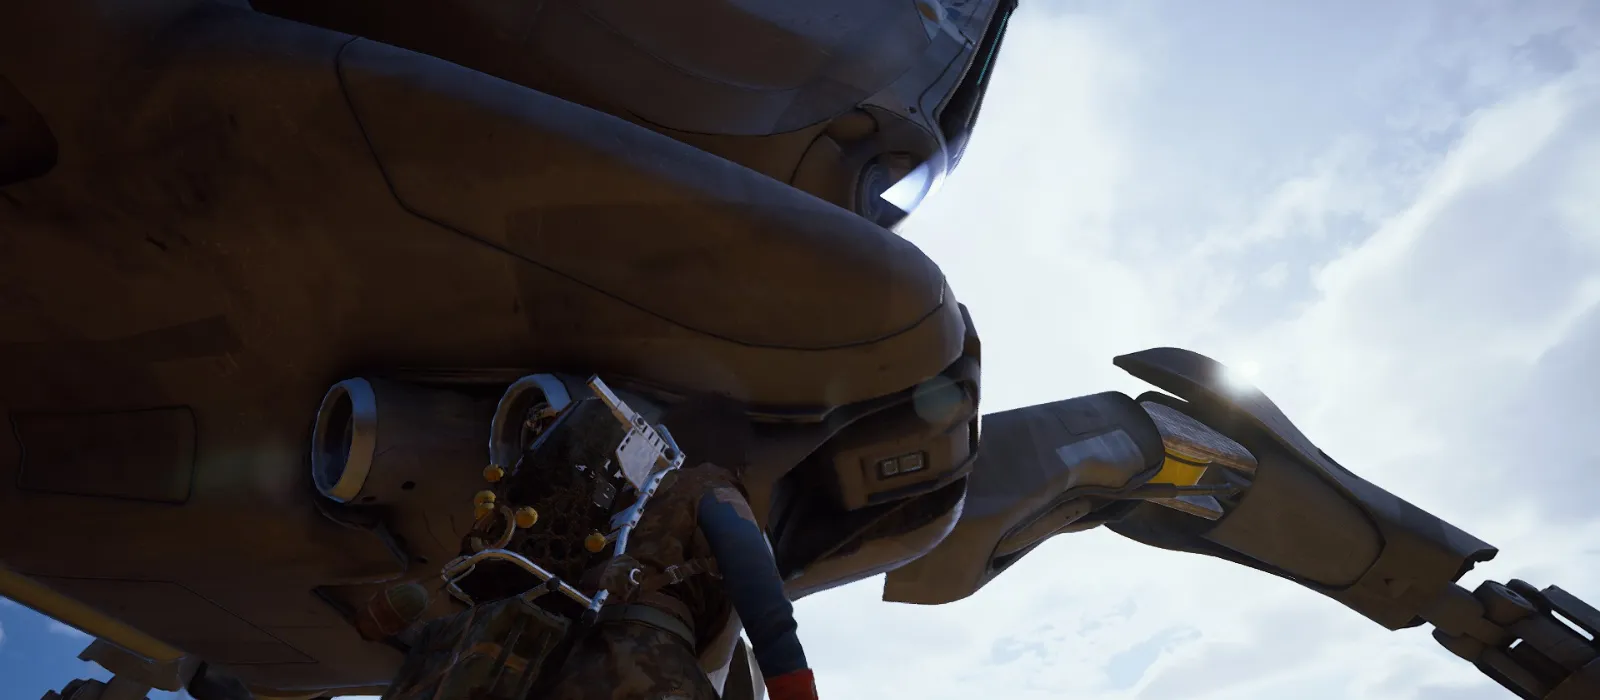
- Leg Stomp: get close to her legs and she stomps. It knocks you down for about two seconds and does real damage. Her legs keep moving even when she is not stomping, so don't camp under her
- Gas capsule: a thick green cloud that blocks sight and drains your stamina. The capsules fly far, then roll along the ground before they burst
- Flashbang capsule: blinks for a moment, then whites out your screen if you are looking at it
- Energy shield: a dome that soaks up every bullet and grenade from outside, the Wolfpack included. It lasts about a minute. Shots fired from inside the dome still hit her
- ARC reinforcements: she calls in Bastions, Bombardiers, Leapers and Rocketeers, with Fireballs, Hornets, Wasps and Ticks on top. The fight is really against all of them
Weak points: how to actually hurt her
Shooting her body or her legs mostly wastes ammo. The damage goes through her face
| Part | What to do |
|---|---|
| Faceplates | Two armored plates on her front. Focus them until they break off |
| Core | The big, glowing red core behind the faceplates. Once it is open, everything goes here |
| Legs | Leave them alone during the fight. Loot them after she falls for +500 XP each |
| Shield | When the dome goes up, stop shooting from outside. Hide, deal with her ARC, or step inside and hit the core |
Her armor is heavy, so ammo and guns with strong ARC armor penetration matter far more than fire rate. More on that in the loadout below
Best loadout for the Matriarch
| Slot | Take | Why |
|---|---|---|
| Main gun | Hullcracker | Its rounds only explode on ARC and have Very Strong ARC armor penetration. The standard Matriarch weapon. Bring plenty of Launcher Ammo |
| Or | Jupiter | Legendary bolt-action sniper with Very Strong ARC armor penetration and 60 damage a shot. Best from high ground. Runs on Energy Clips |
| Second gun | Anything you trust against Raiders | The Hullcracker does nothing to players. Someone will come for you |
| Grenades | Wolfpack and Showstopper | Wolfpacks for her ARC, never into her shield. A Showstopper leaves a Bastion helpless |
| Shield | Heavy Shield or Medium Shield | Missile splash and Rocketeer fire add up fast |
| Healing | Shield Recharger and a Defibrillator | Take more than you think. A long fight eats through all of it |
| Utility | Barricade Kit, Zipline and a Raider Hatch Key | Barricades close the stairs behind you, Ziplines get you up high, and the key gets you out quietly with the Reactor |
Where to fight her on each map
The rule on every map is the same: be above her, behind something solid, with as few ways up to you as possible
Dam Battlegrounds
The easiest of the three: the wiki rates the condition 4 out of 5 here and 5 on the other two maps. She works the open ground around The Breach. Fight her from the roof of the Pipeline Tower or from cover around the Electrical Substation, and watch the stairs for Raiders
Spaceport
She sits in the middle of the map near the Launch Towers. Climb the Launch Towers or the top of Control Tower A6 and shoot down at her. Getting down safely is the hard part, so bring a Zipline and expect people waiting at the bottom
The Blue Gate
The hardest. It is open ground with little cover. The best spot is on top of Reinforced Reception, walled in with barricades. On this map Raiders sometimes team up against her instead of fighting each other
A team plan that works
- Check the schedule and queue the map while the Matriarch window is open
- Take your high ground before you fire a shot. Barricade the way up
- Pick one Raider to deal with her ARC and watch the flanks. The other two go for her
- Break the faceplates, then pour everything into the red core
- Shield up: stop firing from outside, clear her ARC, wait it out
- When she falls, smoke the body, loot the core and the legs fast and leave by the route you planned
What she drops and what it is for
Her main debris holds high-end ARC parts like ARC Alloy, Advanced ARC Powercell, ARC Motion Core, Magnetic Accelerators and Complex Gun Parts. Most of those you can farm elsewhere. The one you came for is the Matriarch Reactor: Legendary, weight 10, sells for 11,000 Coins
| Use | What it takes |
|---|---|
| Trophy Display stage 5 | 3 Matriarch Reactors, 5 Exodus Modules, 3 Geiger Counters and 8 Bombardier Cells. The reward includes an Aphelion and the Snap Hook Blueprint |
| Craft an Aphelion | 1 Matriarch Reactor, 3 Magnetic Accelerators and 3 Complex Gun Parts at Gunsmith level 3, with the Aphelion Blueprint learned |
| Nothing Gained quest | Apollo asks you to destroy a Matriarch and a Queen and hand in one of each Reactor. You get both Reactors back as a reward, plus 10,000 XP |
| Recycle | 1 Power Rod and 1 Magnetic Accelerator |
The Aphelion is the reason most Raiders farm her. It is a Legendary energy battle rifle firing 2-round bursts, with Strong ARC armor penetration
Frequently asked questions
Which maps does the Matriarch spawn on?
Dam Battlegrounds, Spaceport and The Blue Gate, and only while the Matriarch map condition is on
How long does the Matriarch condition last?
One hour, starting on the hour. The live schedule on our store page shows the next window in your region
Where are the Matriarch's weak points?
Break the two faceplates on her front, then shoot the glowing red core behind them. Her legs and body mostly waste ammo
What is the best weapon against the Matriarch?
The Hullcracker, whose rounds only explode on ARC, or the Jupiter from high ground. Both have Very Strong ARC armor penetration
Why can't I damage her shield?
Her energy shield blocks every shot and grenade from outside, the Wolfpack included. It lasts about a minute. Wait it out or shoot her from inside the dome
What is the Matriarch Reactor used for?
Trophy Display stage 5 needs 3, the Aphelion needs 1 to craft and the Nothing Gained quest asks for 1. You can also recycle it or sell it for 11,000 Coins
Can someone kill the Matriarch with me?
Yes. Our Matriarch Kill service sends a PRO to take her down with you, and the Reactor and every other drop are yours
Sources: the ARC Raiders Wiki (CC BY-SA 4.0), Embark Studios news and patch notes